Showing posts with label Valentine's Day. Show all posts

Wednesday, February 1, 2012

IC 2: Hearts!

2012-01-31_17-05-50_872


For the second Iron Craft challenge this year we were to do something with hearts.
My daughters and I made this heart garland.  We took a piece of the stiff glittery felt and cut them in half (so they were approximately 8.5x5.5) and then each half I cut into strips (about one inch wide). Then, my daughters sewed (they're working on learning basic hand sewing, you could use hot glue or even staples if you wanted) the narrow end of two strips with the right sides together (this becomes the top center of the heart).  Then, we sewed the other two ends wrong sides together.  The felt needed a little shaping still after doing that, don't worry about it for now.  We did that with all of the felt. 

I got out some pink, white and red heart shaped beads and some fishing line. One girl worked on one end of the line and the other worked on the opposite end.  They strung some beads and then using a needle threaded with the fishing line would add a heart.  We went through both sides of the heart as well as the inner point of it, it's better if it's a bit closer to the top, I think, so it's less likely to flip upside down.  Then more beads and more hearts until we were done with the hearts.  On the ends of the fishing line, I threaded one more bead and made a loop around that bead (so the bead is trapped in the loop) to keep everything from sliding off the end and to give me something to hang it with. 

After doing that and hanging it, I noticed the beads had a tendency to slide and squish the hearts, so I got out my glue gun and put a little dot of glue on the heart where the fishing line went through to keep it in place. This also helped a bit with the tendency to flip.  Start in the middle and work your way out to both ends.  They still flip some, so I'm going to add some weights to the bottom (one I glued a bead in and that worked pretty well, but you can see it, so I'm going to try to get some fishing weights and hide them a bit more).

Overall the girls did it in a few hours and had a lot of fun doing it.

Tuesday, August 23, 2011

IC 34 - On the Go - Candy Airplanes

This week's Iron Craft Challenge at Just Crafty Enough is On the Go.  So I made some of the candy airplanes that my Mom used to make for party favors growing up.
IC 34: Candy Airplane


For each airplane you need:
1 rubber band
1 roll of Smarties
1 stick of gum
2 Lifesavers (they need to have the hole in the center, Breathsavers and some of the other brands do not)
candy airplane supplies

Step 1: Feed the rubber band through the holes in the Lifesavers.
Candy Airplane step1

Step 2:
Hook both ends of the rubber band over the ends of the stick of gum.
Candy Airplane step2

Step 3:
Use a finger to spread the Lifesavers apart and slide the roll of Smarties in between the lifesavers and in between the rubber band and the stick of gum. Slide it so that the stick of gum is about 1/3 of the way back the roll of Smarties.
Candy Airplane front view

And you're done!
Candy Airplane sideview

Monday, February 14, 2011

Valentine's Day Exchange

Today's Valentine's Day! Did you get your loved ones a gift?  I ran to Walmart this morning for some tissues and paper towels and stood behind a number of men with candy/trinkets waiting to check out at 6:15 in the morning LOL.

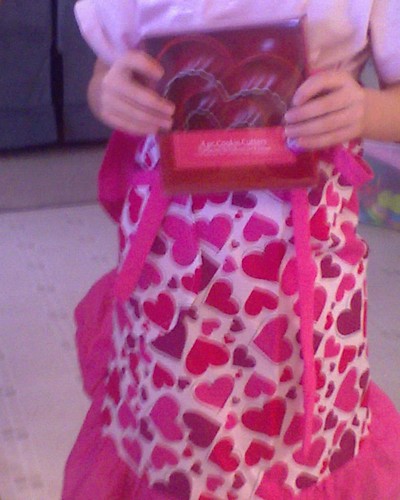
I participated in a Valentine's Day Exchange and last week my package arrived from Brittany.  She made me this awesome Valentine's day Apron AND got me some heart shaped cookie cutters!

I'm sorry the picture is so blurry.  Lately I've been having problems taking pictures. My 4 year old was kind enough to model for me :)

Thanks Brittany!  I love them!

Wednesday, February 3, 2010

WFMW - Saving Valentines


Valentine's day is quickly approaching, can you believe it? In the past my kids have loved looking through the valentines they get from their friends over and over, but it usually ends up with them all over the house. Last year I tried something different and it really worked well, so we'll do it again this year.


I took two pieces of contact paper that was clear (about 18 inches each) peeled the back off of one for each (I turned the corners a bit so they stuck to the table) and then left my daughter (actually they each made their own) place her valentines down on the contact paper how she wanted. Then, we put the other piece of contact paper over top and they used them as placemats for a while. Eventually they forgot about them and I was able to put them away, but in the mean time, they were still able to enjoy the valentines and I didn't have them all over the house.

It's been a while since I've done a WFMW post, but I've been thinking of them!  For more great ideas head over to We are that Family, or click the graphic at the top!