Wednesday, February 16, 2011

Wire Angels

I've been contemplating this idea for years (litterally), but never took the time to do it.  Ever since I first tried crocheting with wire.  Priscilla has these really neat angels that are granny squares,  I made them one year for Christmas gifts (out of yarn).   But I got to thinking that they might look really neat if they were crocheted out of wire and as a bonus, you wouldn't need the pipe cleaner to help with the shaping.

Then, over at Iron Craft, they have a weekly challenge (announced on Thursdays) and I've been wanting to participate for a while but haven't been inspired, until now.  This week's challenge is to make something gold.  Ah Hah!  I've got gold wire and a bit of time.  So I present to you my first ever Iron Craft challenge project. I'm hoping to be able to keep doing these this year, I love the idea.

I didn't actually follow Priscilla's pattern, just used the basic idea.

I made two grannies with 32 gauge gold beading wire (I got this at the craft store a while ago).

Then, I took one of them and made it into a cone (so I took the top side and the right side) by wiring them together (I just used the tail that was hanging there).  The other one, I folded in half to make a triangle and ran the wire down through the holes in the middle to help it stay folded in half.  For the head, I crocheted a circle with three rounds of dc and then wove the wire through the stitches in the last round to gather it. And for the arms I chained the length I needed and then went back and did a sc in each stitch.

Then, I used  the tails to fasten them all together.
Again, I need to work on my pictures, sorry they're so blurry, but my camera battery died so I need to charge it.

Monday, February 14, 2011

Personalized Flash drives

I work for a software company and needed a gift to give my coworkers. I was looking for something that was "techy" but I was trying to keep the cost to under $10 a piece.  And I wanted something that would either be useful or amuse them.

So, I decided to make custom flash drives.

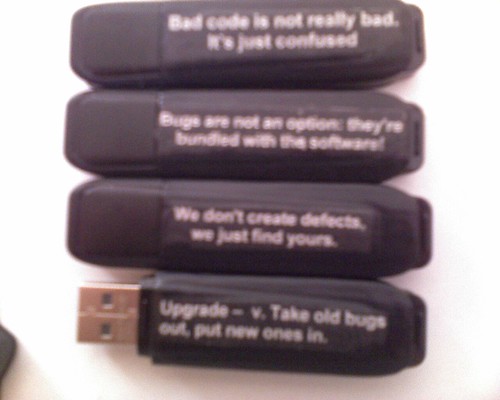
It's really hard to see (sorry for the poor picture quality, but I can't retake it now!) but they say:
"Bad Code isn't really Bad, it's just confused"
"Bugs are not an option, they're bundled with the software"
"We don't create defects, we just find yours"
"Upgrade - v. Take old bugs out, put new ones in"

Here's how I did it:

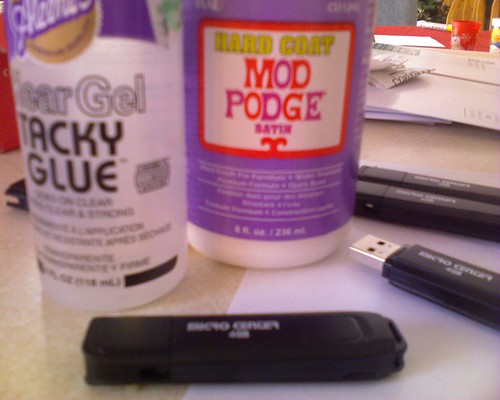
Materials:
Tacky Glue
laser print out of saying trimmed to size*
Modge Podge
paint brush
USB thumb drive

I printed the sayings out on a laser printer using white text on a black background (to match the case of the drive), trimmed them to size and then used the Tacky Glue to glue the saying on to the side of the drive. I removed the cap so I didn't accidently glue it on.  Leave it dry well.

Once it's dried well, coat it with Modge Podge.  I coated the whole side so that it wasn't as obvious that it wasn't on there originally. Let it dry a few hours and then add another coat, repeat a few more times. I put at least 3 coats on.

*I used a laser printer because ink jet ink will run with the modge podge.  I also used a background color to match the thumb drive.  Scrapbook paper would work well too!

Valentine's Day Exchange

Today's Valentine's Day! Did you get your loved ones a gift?  I ran to Walmart this morning for some tissues and paper towels and stood behind a number of men with candy/trinkets waiting to check out at 6:15 in the morning LOL.

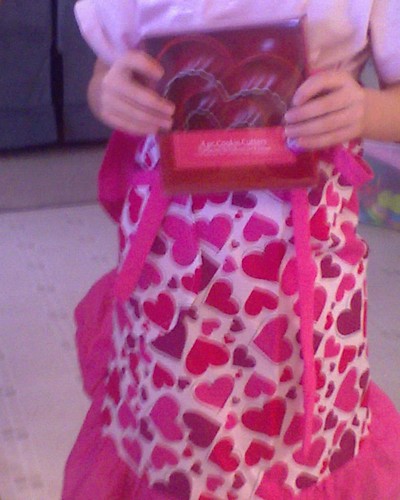
I participated in a Valentine's Day Exchange and last week my package arrived from Brittany.  She made me this awesome Valentine's day Apron AND got me some heart shaped cookie cutters!

I'm sorry the picture is so blurry.  Lately I've been having problems taking pictures. My 4 year old was kind enough to model for me :)

Thanks Brittany!  I love them!

Wednesday, January 12, 2011

WFMW: Organizing and storing ribbon


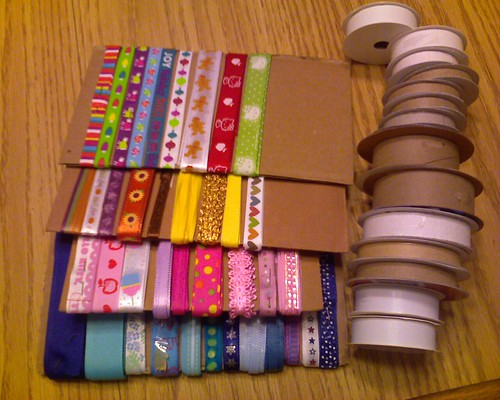
Ribbon is an inexpensive way to dress things up.  I've made hair bows with it, decorated towels, embellished dresses and even used it to hang things up on the wall.  I have a decent size collection of ribbon and was running into issues storing it.  The spools that it comes on are bulky and they were taking up a lot of space. It was also difficult to see what I had when I was looking.  So I did what most crafters these days do. I googled!  I found special ribbon storage boxes (too expensive for the amount that I had, still bulky and most of them would lend to tangling unless you're really careful because the ends of the ribbon hang out).  I found people using paper towel holders or dowel rods through the center of the rolls.  That would work great if I worked where I stored my ribbon, but I usually work in my living room and I store my ribbon in the basement. So that would mean that I'd either need to pull off lengths and cut it down there, or take half the spools off the dowel to get to the one in the middle so I could take it upstairs, not ideal.  Then I saw this idea for wrapping it around the springless clothes pins. That was more like what I was looking for!  Compact, portable, and inexpensive.  Then I tried it.  It was ok, but most of my ribbons didn't lend themselves to wrapping around the clothes pin and those that did, were difficult to keep put once it was on there (they had a tendency to unroll even when pinned). In my Googling, I ran across someone (I think in a comment on one of the other storage methods) who wrapped their ribbon around cardboard they'd cut to the size of their drawer.  So, that's what I did.  I've wrapped them around cardboard and pinned the end so it doesn't unravel and I keep all the pieces of cardboard in a drawer in one of those three drawer rubber maid storage carts.
I can now carry the ribbon I want to where I'm working on it. I can easily see what I've got.  Before the drawer was pretty much full of ribbon and hard to open and close.  Now the ribbon only takes up about a quarter of the space, so I've got room for more!

This is definitely working for me!  For more great tips head over to We Are That Family and Today's Works for Me Wednesday Post!

Wednesday, December 15, 2010

Advent Calendar


I was hoping to do this last year, but never got around to it. I saw this muffin tin idea on a number of other websites and the first time I saw it, I knew it was a great idea for us since most premade advent calendars have chocolate in them and my oldest doesn't like chocolate.

Advent Calender


You take a muffin pan (or several) and create covers for the cups (I used sheets of magnets and then glued scrap book paper and embelishments on them). This way I can choose what goes in AND the holes are big enough that I can put two (or more) things in each one so that both kids get something (since I used a regular size muffin tin, you could use a mini one though if you want). And that's what I was originally planning on doing, adding trinkets for each day (I'd rather not encourage my kids to eat candy every day). But then, I got a better idea, a Puzzle!

First, I put the puzzle together:
Advent Calender

Then I carefully took it apart, starting with the edge
Advent Calender
and putting connecting pieces into each cup of the muffin pan (most cups had 4 pieces, some had more since there are 100 pieces in the puzzle and only 24 cups).
Advent Calender
Once all of the cups were filled I placed the magnets over the holes and hung them up on the wall.  Since the muffin cups were strategically filled, the pieces will always fit in somewhere, the kids just need to figure out where.

The only problem I ran into was that the magnets (which were ones I was recycling, not actual magnet sheets I'd bought) weren't quite strong enough in some cases so the pieces fell out while I was trying to hang it.  Now that it's up and we're not fiddling with it, there isn't a problem.

The nice things about this is that it was cheap (the puzzle was $1 at the dollar store), we don't have a lot of cheap trinkets floating around, the girls are working together on it and we can re-use the puzzle.

This is definitely working for us! Even my youngest is working on the puzzle.  For more great ideas head over to the WFMW post at We Are That Family.

Wednesday, October 27, 2010

Halloween Swap Box


It's arrived!  Well, it actually arrived last week and I'm just now getting time to blog about it.  Sorry!

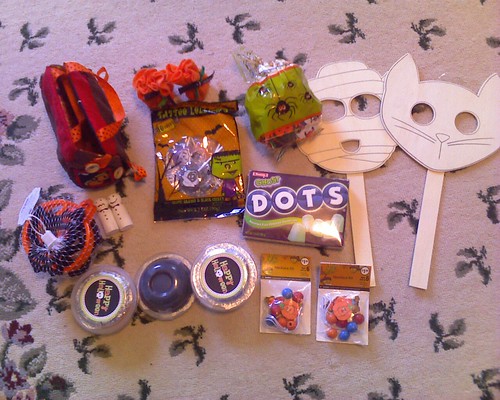
We got a great box full of Halloween stuff from The Monkey House.  Check it out:


There is a house purse that opens up with two peg ghosts to go inside, some lollipops, two felt pumpkins with candy corn in them, a bag of foam stickers two wooden masks, a box of dots, a bag of cookie cutters, some cool playdough and two necklace kits.  The girls immedaitely dove into the playdough with the cookie cutters as soon as they saw it, have been sampling the candy corn and have since made their necklaces.

This swap was a lot of fun.  I hope to do it again sometime!

Tuesday, October 12, 2010

WFMW - Taming Flashcards


I'm not sure where I got this idea from, it might've been someone else's WFMW post, but it's working so well for us that I thought I'd share it. If you think you know where I got the idea from, feel free to comment with the site.


Flash cards are a great tool for kids to learn with, but they're essentially a deck of cards and have a tendency to get separated and you end up finding them everywhere.  So, I've been taking them, punching two holes in the top of all the cards and then I put binder rings through the holes.  You can get a pack of binder rings at Office Max.


This way, my girls can carry the flash cards around with them, they don't loose any cards and there's no clean up.  They have a tendency to pick them up when they're playing and just start flipping through them. They can also take them in the car on long trips to quiz each other a lot easier.

For more great ideas, head over to the WFMW post at We are THAT Family!